Project and client management work best as two linked systems, not one blurred job. Delivery lives on scope, schedule, and resourcing; the relationship lives on trust, expectations, and retention. Agencies that connect them, with a shared client record and a fixed...
Calendar task integration turns your to-do list into scheduled, time-bound calendar blocks so work actually gets done instead of piling up unseen. The fastest path is either a native tasks layer inside your calendar app or an OAuth-based connector syncing a separate...
Quarterly planning means running your business goals on a 90-day cycle instead of a single annual push, reviewing progress and adjusting course every quarter. The practical version that works best: pick a few measurable priorities, assign a clear owner to each, set...
Most people don’t need one framework. They need three, stacked by time horizon: a long-range direction setter like a BHAG or OGSM, a quarterly execution engine like OKRs, and SMART criteria to keep the resulting key results honest and measurable. Skip the strategic...
The PARA method sorts every file, note, and task you own into four folders (Projects, Areas, Resources, Archives) based on how soon you need to act on it. The main payoff is speed: you stop hunting through nested folders and start finding what you need in seconds,...
The best prioritization frameworks for anyone juggling client work, personal goals, and everything in between are the Eisenhower Matrix, the Pareto principle (80/20), the 1-3-5 Rule, time blocking, and a weekly review. Pick one today: schedule a 90-minute protected...
The fastest way to turn emails into tasks is to use your inbox’s built-in conversion feature (Outlook’s drag-to-Tasks or Gmail’s Tasks panel) for one-off items, and automation rules for anything that repeats. Manual capture works fine at low volume; once the same type...
A hobby project planner is a tool, template, or notebook system that helps you capture ideas and, more importantly, always know your single next physical action. Right now, pick one tool, however basic, and write down the very next step for your current project....
AI agents reclaim your schedule by auto-scheduling tasks, defending focus blocks, and resolving conflicts before you even notice them, but only when you keep human-in-the-loop controls turned on. The strongest results come from task-first tools that unify your to-do...
AI goal planning converts a single sentence of intent, like “I want to get fit” or “I want a promotion,” into a measurable SMART goal with milestones, weekly tasks, and deadlines already attached. Within minutes, you get a concrete plan for the next seven days plus...
The Client Onboarding Checklist That Gets New Clients Live in 5–7 Days
Here is the copy-paste client onboarding checklist you can start using today. Each step has an owner, a due window, and a clear definition of done. Zapier’s 6-step onboarding framework confirms that welcome documents, legal and payment items, and open communication lines are the three non-negotiable early tasks. This checklist builds on that foundation and adds the intake, setup, and review layers that turn a good first impression into a retained client.
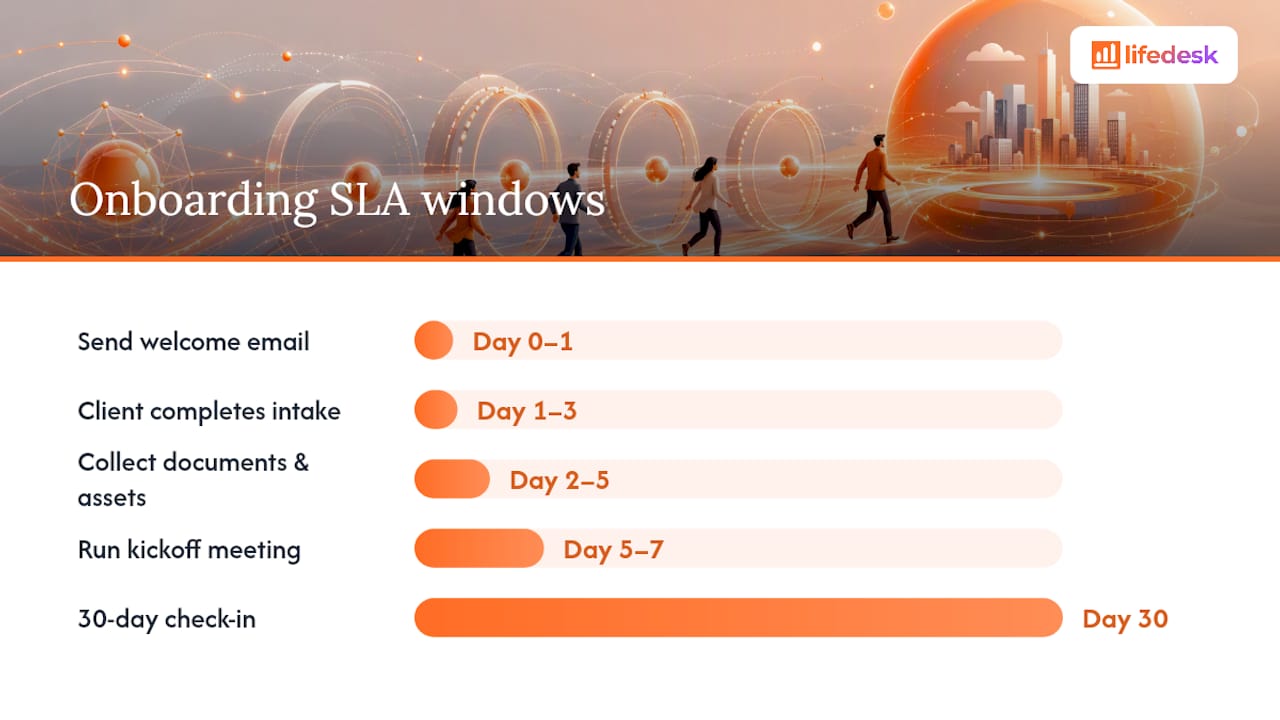
Send welcome email + portal access — Owner: Sales/Account Manager — Due: within 24 hours of signing
Collect intake form and discovery answers — Owner: Account Manager, Client — Due: days 1–3
Gather required documents and assets — Owner: Client, with AM follow-up — Due: days 2–5
Confirm contract, SOW, and payment setup — Owner: Sales/Account Manager — Due: day 1–2 (before work starts)
Run kickoff meeting and align on 30-day plan — Owner: Project Lead — Due: day 5–7
Deliver first tangible value — Owner: Project Lead/Delivery Team — Due: within 14 days
30-day check-in and feedback collection — Owner: Account Manager — Due: day 30
Pro Tip:Set a calendar reminder at day 3 and day 7 for any step that depends on the client. Most onboarding delays happen because the team waits politely instead of nudging early.
Key Takeaways
A structured client onboarding checklist, completed within five to seven days, is the single most reliable way to reduce early churn and deliver first value before a client has time to second-guess the engagement.
Point
Details
Send welcome within 24 hours
The welcome email and portal link go out the same day the contract is signed, no exceptions.
Name every document request
Specific file names and formats cut collection time from days to hours.
Automate day 3, 7, and 10 reminders
Automated nudges replace polite waiting and keep collection on track without manual follow-up.
Run a structured kickoff by day 7
Document decisions and the 30-day plan in writing before the call ends; share it the same day.
LifeDesk unifies the whole workflow
One client record in LifeDesk holds the checklist, tasks, documents, and reminders so nothing falls between tools.
What does a client onboarding checklist look like in practice?
Copy this table into your project tool, Google Doc, or print it as a PDF. Adjust the owner names and SLA windows to match your business, then attach it to every new client record. SuiteFiles frames onboarding as far more than a welcome email, recommending pre-onboarding checks, formal intake forms, SLAs, and a 30-day follow-up as the minimum standard.
Task
Owner
Due
Status
Send welcome email + onboarding packet
Account Manager
Day 0–1
☐
Share portal or workspace link
Account Manager
Day 0–1
☐
Send intake/questionnaire form
Account Manager
Day 1
☐
Client completes intake form
Client
Day 1–3
☐
Collect required documents and assets
Client + AM follow-up
Day 2–5
☐
Confirm signed contract and SOW
Sales/AM
Day 1–2
☐
Set up invoicing and payment schedule
Sales/Finance
Day 1–2
☐
Create project folders and name files
Ops/Project Lead
Day 2–3 after collection
☐
Run kickoff meeting
Project Lead
Day 5–7
☐
Deliver first milestone or quick win
Delivery Team
Day 7–14
☐
30-day check-in call
Account Manager
Day 30
☐
How to use this table: Duplicate it into your project management tool or paste it into a Google Doc. Replace “Account Manager” with real names. Set the SLA column to match your service agreement. Attach the completed table to the client’s record so anyone on the team can see where onboarding stands at a glance.
HubSpot’s free onboarding templates include a welcome packet, intake form, and timeline you can adapt directly. Download those, swap in your branding and contact details, and you have a complete starter kit without building from scratch.
Statistic to know:OnboardMap’s playbook reports that top firms complete onboarding in roughly five days using a single portal, named document requests, and automated reminders. The difference between five days and five weeks is almost always process, not effort.
How to execute each onboarding step without guessing
CustomerSuccessCollective’s 11-step checklist centers early discovery and customer journey mapping as the highest-leverage activities for reducing churn risk. The eight steps below fold that logic in.
Step 1: Pre-onboarding confirmation (before day 1)
Sales sends a signed contract confirmation and a “what happens next” summary.
Account Manager receives the internal handoff note from Sales (client goals, deal terms, any promises made).
Create the client record in your project workspace.
Done when: Internal handoff note is filed and the client has confirmed receipt of the contract.
Step 2: Welcome and portal access (day 0–1)
Send the welcome email with the onboarding packet attached (scope summary, key contacts, next steps).
Share the client portal or workspace link with view/edit permissions set correctly.
Include a short video or one-page “how we work” guide.
Done when: Client has logged in or confirmed receipt.
Step 3: Discovery and intake (days 1–3)
Send the intake questionnaire. Name every field specifically (“Please upload your current logo in PNG format, minimum 500px wide”) rather than asking for “brand assets.”
Schedule a 20-minute discovery call if the intake form raises open questions.
Done when: Intake form is submitted and reviewed by the Account Manager.
Pro Tip:Name document requests precisely. “Please send your logo” produces a JPEG from 2014. “Please upload your logo in PNG or SVG format, at least 800px wide” produces what you actually need.
Step 4: Document and asset collection (days 2–5)
Send a named document request list (not a vague “please send files”).
Set an automated reminder at day 3 and day 7 if files are outstanding.
Verify each file against the request list before marking collection complete.
Done when: All named files are uploaded, verified, and filed in the correct folder.
Step 5: Credentials and access setup (days 2–4)
Collect credentials through an encrypted channel or secrets manager, never plain email.
Grant the team only the access level they need (principle of least privilege).
Log all access grants in the client record.
Done when: Every team member has the access they need and credentials are stored securely.
Step 6: Kickoff meeting (day 5–7)
Run a 30–45 minute kickoff using the agenda in the next section.
Document decisions, owners, and deadlines in the client record immediately after.
Done when: Meeting notes are filed and the client has confirmed the 30-day plan in writing.
Step 7: First value delivery (days 7–14)
Identify the smallest deliverable that proves the engagement is working (a draft, a report, a first build).
Share it with a short context note explaining what it demonstrates.
Done when: Client has acknowledged receipt and given initial feedback.
Step 8: 30-day review (day 30)
Schedule a 20-minute call. Ask: “Is there anything we could do differently?” before asking about results.
Log feedback in the client record and create follow-up tasks for any issues raised.
Done when: Notes are filed and any action items have owners and due dates.
What contracts, payments, and paperwork do you need to collect?
Getting the legal and financial layer right at the start prevents the most common mid-project disputes. Here is what to collect and how to handle it.
Contract and SOW checklist
Signed master service agreement or project contract
Scope of work with explicit deliverables, exclusions, and revision limits
Milestone or delivery schedule with dates
Change-order process (how scope changes are requested, priced, and approved)
SLA or response-time agreement (your response window, their response window)
Confidentiality or NDA if applicable
Payment setup
Keep billing simple. Three options work for most freelancers and small businesses:
Send the first invoice at contract signing, not at project completion. Waiting until the end creates cash flow gaps and gives clients a reason to delay.
Pro Tip:For U.S.-based contractors, collect a W-9 before issuing any payment over $600 in a calendar year. Store it in the client’s Permanent folder alongside the signed contract. The IRS requires a 1099-NEC for payments above that threshold, and hunting for W-9s in January is a reliable way to lose an afternoon.
Secure document handling
Never send or request credentials, tax IDs, or signed agreements over plain email. Use an encrypted file-sharing tool or a client portal with access controls. Store sensitive files in a dedicated “Permanent” or “Reference” folder inside the client record, separate from working files. That folder should contain the signed contract, W-9 (if applicable), and any ID or compliance documents, and it should be read-only for anyone who does not need to update it.
How do you run a kickoff meeting that prevents early misalignment?
A kickoff meeting is the single highest-leverage conversation in the onboarding process. Done well, it aligns expectations before any work is delivered. Done poorly, it creates the misalignment that causes churn three months later.
30–45 minute kickoff agenda
Goals and success metrics (10 min) — What does success look like at 30, 60, and 90 days? Get specific numbers or outcomes, not adjectives.
30-day plan walkthrough (10 min) — Walk through the first milestone, who owns it, and when the client will see it.
Stakeholders and decision rights (5 min) — Who approves deliverables on the client side? Who is the single point of contact?
Communication norms (5 min) — Email response window (24–48 business hours is a reasonable standard), meeting cadence (weekly or biweekly), and how to escalate urgent issues.
Immediate client actions (5 min) — What does the client need to do in the next 48 hours? Name the tasks and confirm ownership.
Q&A and open items (5 min) — Capture anything unresolved and assign an owner and deadline before the call ends.
Post-kickoff documentation checklist
Meeting notes with decisions, owners, and deadlines filed in the client record
30-day plan shared with the client in writing (email or shared doc)
Immediate client actions confirmed in a follow-up email within 2 hours
Next meeting scheduled before the call ends
For teams running multiple client kickoffs, consider adapting interactive orientation techniques to make the first meeting more engaging. A short “how we work” exercise or a shared goal-setting activity can shift the tone from transactional to collaborative.
How should you organize client files so nothing gets lost?
The goal of client file organization is that anyone on your team can find any document in under 30 seconds without asking. The Drive recommends organizing at the top level by client, keeping folder hierarchies shallow (two to three levels), and using consistent naming conventions to scale across dozens of clients.
Use this pattern: YYYY-MM-DD_ClientName_DocumentType_Detail
Examples:
2026-03-15_AcmeCorp_Contract_SignedMSA
2026-03-20_AcmeCorp_Invoice_001
2026-04-01_AcmeCorp_Deliverable_LogoV1
Permissions quick-check
Edit access: Project lead and the assigned Account Manager only
View access: Client (for deliverables and shared docs), wider team as needed
Permanent folder: Read-only for everyone except the Account Manager or admin
Credentials: Stored in a secrets manager, never in the folder tree
Pro Tip:Create a blank “New Client” folder template with all subfolders already named. When a client signs, duplicate the template and rename it. Folder creation takes 10 seconds instead of 10 minutes, and the structure is always consistent.
Which templates and automations save the most time during onboarding?
Must-have templates
Welcome email: Two paragraphs. What happens next, who to contact, link to the portal.
Intake/questionnaire form: 8–12 fields covering goals, current tools, key contacts, assets needed, and timeline expectations.
Kickoff agenda: The 30–45 minute template from the section above.
Named document request list: Specific file names, formats, and sizes for every asset you need.
Automations worth building
Reminder at day 3 and day 7 for outstanding intake forms or documents
Status update to the internal team when collection is marked complete
Auto-creation of the client folder from the template when a new client record is created
Recurring task for the 30-day review, triggered at contract signing
Calendar invite for the kickoff meeting, sent with the welcome email
LifeDesk implementation workflow
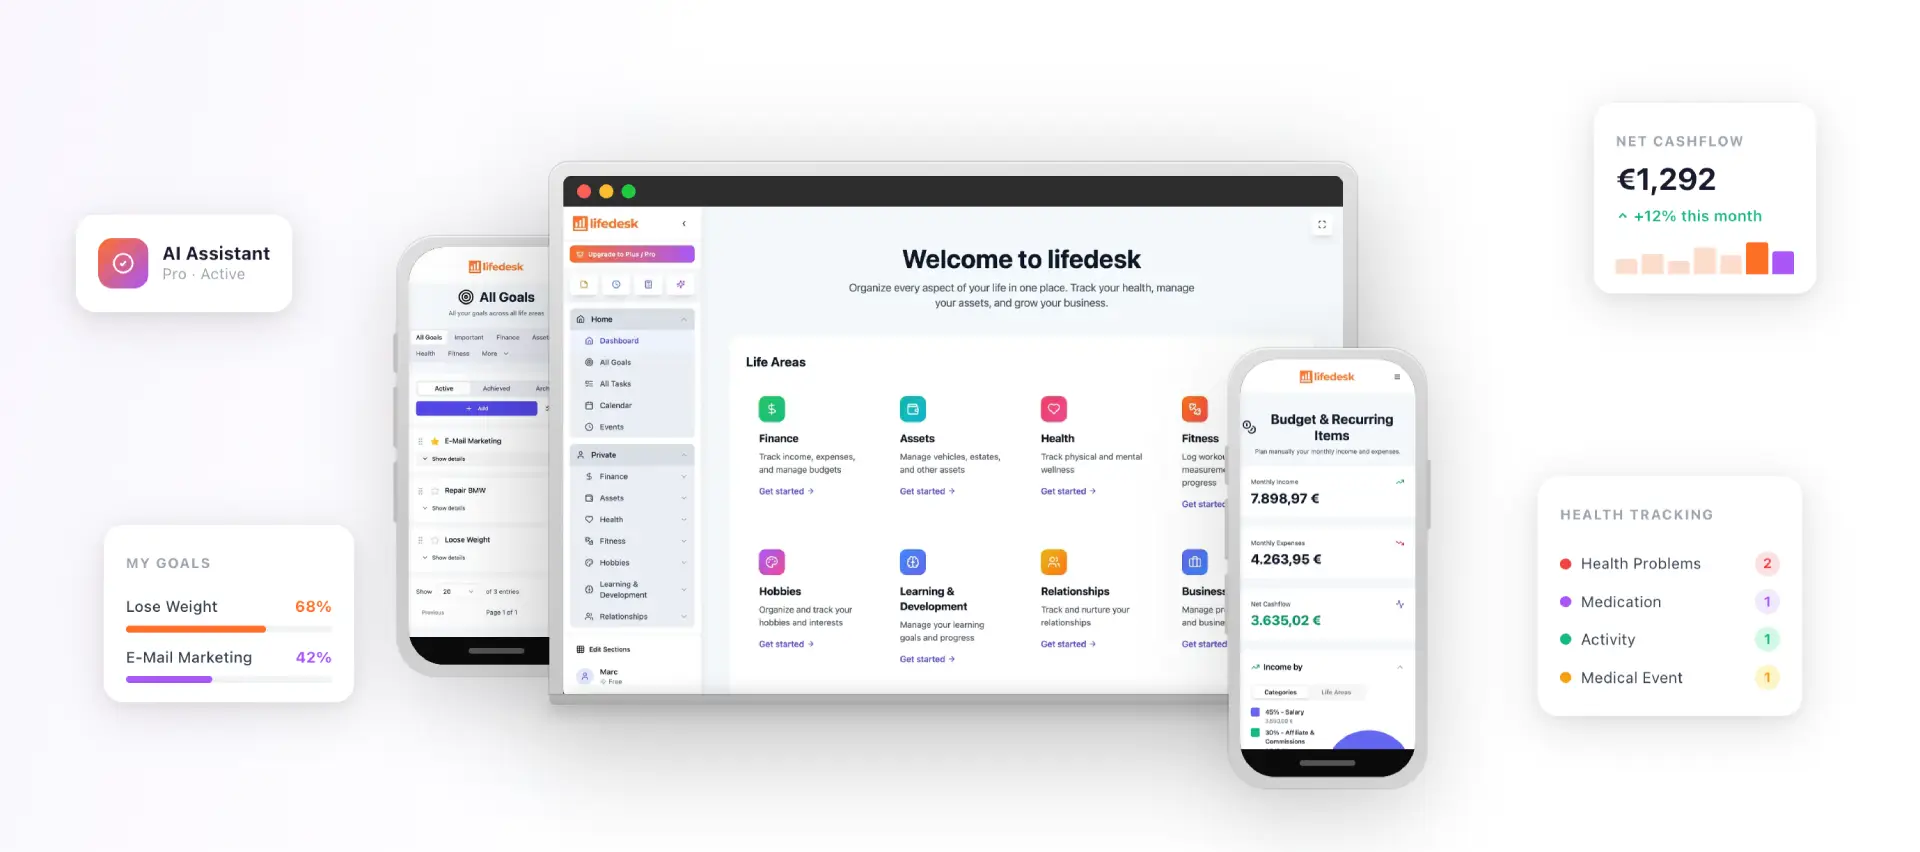
Here is how the same process runs inside LifeDesk. When a new client is added to the client CRM, you apply an onboarding project template that auto-creates the folder structure, generates the task list with owners and due dates, and queues the welcome email. The project management features let you map each onboarding milestone to a trackable task, so the team sees exactly which step is open, overdue, or complete without a status meeting.
Reminders at day 3, 7, and 10 are set once in the template and fire automatically for every new client. The AI productivity assistant can draft the welcome email and intake form from a prompt, cutting the time to send the first touchpoint from an hour to five minutes.
The single biggest onboarding mistake is treating each new client as a one-off setup. Build the template once, attach it to every new client record, and let the system handle the reminders and folder creation. The OnboardMap playbook identifies document collection as the most common drop-off point precisely because it depends entirely on the client. Automated nudges and a single upload portal remove that friction without requiring manual follow-up from your team.
Pro Tip:Use LifeDesk’s business tasks and goals features to set a measurable onboarding completion goal (e.g., “all 11 tasks complete by day 7”) and track it across clients. When one client’s onboarding runs long, you see it immediately instead of discovering it at the 30-day review.
Key takeaways from this onboarding guide
Run your next client through these five moves and you will cover 90% of what makes onboarding succeed or fail.
Respond within 24 hours of signing. Send the welcome email and portal link the same day the contract is signed.
Name every document request specifically. Vague requests stall collection. Specific file names and formats get results.
Automate reminders at day 3, 7, and 10. Most delays happen because teams wait politely. Automated nudges remove the awkwardness.
Run a structured kickoff by day 7. Document decisions, owners, and the 30-day plan in writing before the call ends.
Schedule the 30-day review at contract signing. Catching small irritants at day 30 is far cheaper than losing a client at month three.
One-paragraph playbook: Send the welcome email and portal link within 24 hours of signing. Use a named document request list and set automated reminders at day 3 and day 7 for anything outstanding. Run a 30–45 minute kickoff by day 7, document the decisions and 30-day plan in writing, and share it with the client the same day. Schedule the 30-day check-in at contract signing so it never gets skipped, and ask “Is there anything we could do differently?” before asking about results.
Measuring success: Track three numbers: time-to-first-value (days from signing to first deliverable), onboarding completion rate (percentage of clients who complete all checklist steps within the target window), and 30-day retention. If any of those numbers slips, the checklist tells you exactly where.
LifeDesk handles the entire onboarding workflow in one place
Most freelancers and small business owners run onboarding across four or five disconnected tools: a spreadsheet for tasks, a shared drive for files, a separate form tool for intake, and a calendar for reminders. Every handoff between those tools is a place where something gets missed.
LifeDesk replaces that stack with a single client record that holds the onboarding checklist, project tasks, document storage, and automated reminders together. Add a new client, apply the onboarding template, and the platform creates the folder structure, generates the task list with owners and due dates, and queues the day 3 and day 7 reminders automatically. The AI assistant drafts the welcome email in seconds. The project management tools track every milestone from kickoff to 30-day review without a status meeting.
LifeDesk runs on web, iOS, and Android, so the Account Manager updating a task on their phone and the project lead reviewing milestones on a laptop are always looking at the same record. There is a free plan to start, and the paid tiers unlock bank account integration, higher limits, and the full AI assistant.
See everything LifeDesk can do for your client workflow on the features page, or start with the tasks and goals tools to build your first onboarding template today.
What should a client onboarding checklist include?
A complete checklist covers welcome documents, intake/questionnaire, signed contract and SOW, payment setup, credentials and access, a kickoff meeting, first value delivery, and a 30-day review. Zapier’s framework identifies welcome documents, legal and payment items, and open communication lines as the non-negotiable early tasks.
How long should client onboarding take?
Most well-run onboarding processes complete in five to seven days. OnboardMap reports that top firms hit roughly five days using a single portal, named document requests, and automated reminders.
Why do clients stall during onboarding?
Document collection is the most common drop-off point because it shifts the work entirely to the client. Vague requests, no reminders, and multiple upload locations are the usual culprits. Named requests and automated nudges at day 3 and day 7 fix most of the friction.
What is the best way to organize client documents?
Keep the folder hierarchy shallow (two to three levels), organize at the top level by client, and use a consistent naming pattern such as YYYY-MM-DD_ClientName_DocumentType. CLIMB recommends a dedicated “Permanent” folder for signed contracts and compliance records, separate from working files.
Can LifeDesk manage the full onboarding checklist?
Yes. LifeDesk’s client CRM and project management tools let you attach an onboarding template to every new client record, auto-create tasks with owners and due dates, store documents, and set automated reminders, all in one platform available on web, iOS, and Android.